Showing posts with label gardening tips. Show all posts

Make you own hanging basket liners

Make you own hanging basket linerYou can make an efficient, hanging basket liner, white or whatever color, that costs next to nothing.

This kind of hanging basket liner will keep your plants in place and moist and it, generally, comes for free, and will last for years, unlike the coir, moss, or even fake moss ones.

You can choose to make drainage holes or not, depending how well your plants may like having their “feet” in water. Considering, however, that generally, hanging baskets, when with bracket attached to wall of house, are in the so-called rain shadow, and thus do not get watered naturally by the rain having no drainage holes in the liner saves you watering on a daily basis.

There are many options for recycling plastic bags for use as handing basket liners. Compost bags of various sizes, as well as others, are suitable and the colors may vary from white, to blue or black. It all depends. On the other hand, other bags you can use might be transparent, which even allows you to see the growth of the roots and thus can see whether plants may get root bound. Spider plants (Chlorophytum comosum) is a candidate that gets root bound in pots or handing baskets quite quickly, which then meas either re-potting or splitting.

As the bags you may be using will not be designed to fit a hanging basket as a liner you will have to do some cutting and some folding and tucking, but it will be worth it alone for the fact that (1) you don't have to buy a liner every year and (2) you keep some plastic out of the waste stream (for some years at least). The important thing is that it works and well worth it. A win-win on so many levels.

© 2018

Zip ties and their many uses

by Michael Smith (Veshengro)

Zip ties and their many uses on the farm, homestead, the garden and elsewherezip-tiesZip ties, or as they are called in England, cable ties, are, even though they are plastic and some people do have a problem with plastic, are often a godsend when it comes to temporarily or even, more or less, permanently fixing something, be this in the home, on the farm, the homestead, the garden or elsewhere. The uses literally are legion.

While, as said, those little (and not so little) ties are plastic and thus (probably) not all that green but they are so very useful for so many things, be it for temporary or even permanent fixing of things.

These simple strips, typically made of plastic, come in many lengths and feature a special ratcheting design, some even can be reused in that they have a “reversible” catch. When you insert the pointed end into a slot at the opposite end, it latches firmly in place and creates a loop that can be tightened (but not loosened – unless the special kind) to whatever size you need. You can combine multiple zip ties to create much longer zip ties.

The potential uses for zip ties are almost limitless and all I can give you here are a few example of their uses around the farm, the garden, the homestead and the home. As far as I am concerned zip ties are so useful that I even pick up any unused ones that people, who have been using them somewhere, have dropped. Weird, I know, but then that's what I am like; waste not want not.

The uses for those – predominately – plastic strips, those cable- or zip ties are legion and, more or less, I should guess, endless, on the farm, in the garden, in the home, and elsewhere.

Installing wire mesh fencing: When installing mesh wire fencing, it doesn't get much easier than securing the wire in place with large zip ties. The evenly spaced gaps in the mesh wire ensures that you can slide the ties through wherever necessary, securing them around metal stakes to hold the wire upright. They work equally well for installing deer netting.

Guiding grape vines and other climbers: Simply attach the vines to the trellis of wires or fence on which you want them to grow up on with zip ties. It could not be easier. Eventually, the vines will curl their tendrils around the wires and be able to support themselves, but in the meantime, the ties effectively hold the vines in place.

The same applies to all kinds of vines, not just grape vines, and delicate plants that need support can also be helped with zip ties.

Repairing fruit tree branches: Unfortunately, it's fairly common for fruit trees to overestimate how much fruit their branches can support and branches can crack under the weight of a heavy crop. However, as long as the branch is not fully broken, it is possible to support it with a stake and allow the tree to heal the crack. Zip ties are an important part of the process, perfect for holding everything in position. This may even work, though I have not tried it, with tree saplings that have been accidentally broken though not completely off.

Securing tarps: Need to tie down a tarp to keep something dry? Loop some zip ties through the grommets on the tarp and secure it in place. It does not get easier than that now, does it.

Pole bean teepee (pole beans = runner beans in Britain): When installing bean poles and turning them into the teepee shape there is no easier way than using some cable ties and, voila, ready is the thing. While it is possible to do it with string, or wire, doing it on one's own with the latter two can be a little bit of a problem, time-consuming and fiddly. Not so with cable ties.

Bicycles: Here they have their first uses, obviously, to hold cables and such in place, but there are also things on the bike that can be temporarily or permanently tied down with cable ties.

Shower curtains: Want to put up a shower curtain (think tarp but hanging down) onto a pole and there are no hooks or rings. Zip ties through the grommets and over the pole and voila, there it hangs ready for use.

This is but a very small list of the uses for zip ties around farm, homestead, home, etc., and one could, I should guess, fill a small book with them at least and after publication of such book another hundred uses would come up. So, maybe, a book I won't write about it.

© 2018

Pruning your trees

by Michael Smith (Veshengro)

Pruning your treesOnce the leaves have fallen in late autumn/early winter, take the opportunity to get in there to remove any congested growth. For some fruit trees, however, the time to do any real pruning and cutting back is not that time of year but much earlier or somewhat later.

Trees of the prunus species, cherries, plums, damsons, and related, should be pruned – pardon the almost pun – while the sap is rising, after they have flowered. While that may reduce any fruit production for that year it is r4eckoned to reduce the risk of any infection entering the tree.

Apple trees have a very narrow window, so to speak, in which pruning should take place and that is about from mid to late January to the end of February (in Europe at least). Others can be pruned more or less immediately after the leaves have all fallen off and this also goes for the majority of ornamental shrubs and trees.

© 2017

Regrowing vegetables from kitchen scraps

by Michael Smith (Veshengro)

Leaf cabbage regrown from root_webYes, it does work. At least with some vegetables. Potatoes are the most prolific ones in that department and they seem to be able to grow from even the smallest parts left, for instance, in compost. That is how I end up with potatoes growing in many of the containers in which I grow other vegetables – I only garden in containers, at home, basically – where I never planted them. Even after two to three years in the composter those scraps are still viable.

Other vegetables, however, can (also) be grown from scraps in different ways. Though I have to add a caveat and that is that some will regrow and others won't and that of the same type even.

Celery: The bottoms of stalk celery often will regrow and will then keep producing new celery stalks. I have done it more than once but also managed to kill them more than once. How I killed them? I have no idea.

Cabbage: I have tried this successfully with the bottom of a shop-bought leaf cabbage (a savoy kind of cabbage) and while it took some while (a couple of weeks) it works to regrow new leaves in head formation though they will never set proper heads again, and even multiple “heads” may appear.

Theoretically, more than likely, all cabbages will regrow from such scraps though I cannot entirely vouch for that not having tried and done it. Proper heads, however, even if it was a “head” cabbage will not form again. Or so the theory goes.

Spring Onion: Put the bottoms of those, the bulbs, for you really, theoretically and practically only use the green bits (just like large chives), into a pot and they will regrow. Keep cutting and using the green regrowth.

I have also been running a trial to regrow radishes, for the leaves though as they can be eaten, for new radishes will not happen, by having planted the tops in pots. A couple, unfortunately, died but while others did grow and that quite well. The leaves can be used in stews and such, though they also could be used in salads but they are quite peppery in taste.

Lettuces, of all different kinds, apparently, can also be regrown from the bottom bits but I have not, as yet, experimented in that department as I am not the greatest lettuce fan, even though being vegetarian.

Apparently there are also several others that can be regrown, such as turnips (from their bottoms), as well fennel (also from the base), as well as onions (from root base, though it more often than not does not work), garlic, and apparently even mushrooms can be regrown from the stalk. Will have to give that a try some day.

Maybe it is just a case of experimenting with what can be regrown from scraps (not seeds) – or from cuttings, such as in the case of basil. There may be more there than we are aware of. Most herbs can be regrown from cuttings, but then again those cuttings are not really kitchen scraps.

Then there are others that can be regrown from the seeds that we discard as scraps in the kitchen, such as bell peppers, and as well as others. Getting bell peppers to grow properly in the British or similar climes is not too easy though.

Come on, give it a try. I sure will try more.

© 2017

Plastic frozen food bags as hanging basket liner

by Michael Smith (Veshengro)

Wall_hanging_basket_lined_with_frozen_food_bag1I am one of those people who take reuse and all what is related to that to another dimension at times, as regular readers will know, and I do, yes, tend to keep those bags from frozen food.

Being a vegetarian, single, and not being able to shop for fresh vegetables daily or such, I tend to buy them frozen. Alas, they then come in those bags. But waste not want not they are, after being rinsed out, used for all manner of things, such as sandwich bags and, well, in this case to line hanging baskets.

While coir liners are compostable and all that they cost money and they don't always come in the shape of the particular hanging basket – or container that one is repurposing as a hanging basket – and I also often like to keep the plants in those baskets for longer than the lifespan of a coir liner.

Previously I have used cut up potting compost bags and such but none to hand when I wanted to do a hanging basket – this one, as you can see from the picture, however, is actually a wall mounted one – and remembered that I did have those frozen food bags.

Well, cut a long story short – and cutting was involved in the work as well – two bags later with the help of my trusty garden scissors the basket was lined and then filled with leaf mold. The latter no longer involved any plastic bags or cutting. The cost of the entire exercise? Aside from a little battery power for the drill to make the whole for the screw to hold the basket – zero. The basket was found, the screw and rawlplug, aka wall plug or screw anchor, too. Waste not want not obviously.

© 2017

Garden scissors and their uses

by Michael Smith (Veshengro)

What are garden scissors used for and learn how to use scissors in the garden

gardening scissorsGarden scissors vs pruner shears or secateurs

When you mention garden scissors to some people they will counter with “oh, you mean pruning shears” (or they may say secateurs instead, depending where they are from in the English speaking world). But no, that is not what I mean. I mean scissors for use in the garden. While, to some extent, secateurs can be used for the same tasks in the garden as scissors there are many tasks that scissors either do better or can only do properly.

What are garden scissors used for?

OK, as I have said above your secateurs can do a lot of the cutting tasks that (garden) scissors would be employed for as well, such as deadheading, cutting off dead and dying leaves, and harvesting fruit and vegetables, but they will have to be very sharp to do that well. Scissors are much better suited for this task and when it comes to opening seed packets, or bags of compost and such then they will always outperform secateurs by miles.

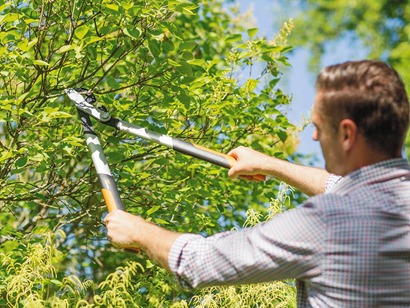
Garden scissors are not something you would want to use for pruning, however, unless you are trimming and shaping small box trees or such. General pruning is done with bypass secateurs for green material and with anvil secateurs for dead woody matter. Unless you are using Rolcut or Original Loewe, their parent. Those are anvil secateurs that can do both equally well.

How to use scissors in the garden?

Many readers may now wonder as to whether they need spacial garden scissors for use in the garden and the simple and short answer here is a firm no. No, you do not. You can use ordinary common-garden (pardon the pun) plain household scissors though most garden scissors have two equal size blades (in width and design) which is not always the case with ordinary household scissors.

Scissors can be used in the garden to deadhead flowers, remove dead leaves, harvest vegetables, and snip herbs. You definitely cannot beat scissors for cutting seed packets or potting soil bags. Scissors are invaluable when you need to get into the impenetrable packaging, whether of new pairs of secateurs, or whatever, and for many other tasks.

I, personally, would not got as far as using them for edge paths or beds in the garden but I know that some people do that.

As you can see, there are many uses for scissors in the garden, be it those trusty household types of scissors or those that are specifically sold for use in horticulture. Either of will do the job but one thing they should be, ideally, and that is sharp.

If you have an old pair of small to medium household scissors that no longer are the best for use in the home or an old one that you can refurbish – at, ideally, zero cost bar a little penetrating oil and cleaning – then go for and with that. Otherwise you will find Poundland – or Aldi or Lidl at times – having cheap garden scissors for between a Pound and three.

On the other hand car boot sales or charity shops may have a good useable pair of scissors just asking to be used in the garden in the 25p or 50p box which, with a small file and worked in the right way, can be just the ticket for use as a pair of garden scissors.

But, whatever you do a pair or (garden) scissors would be in your armory for your garden. A pair of garden scissors can reach parts other garden tools can not.

© 2017

Reusing plastic utensils in the garden

Reusing plastic utensils (flatware) in the garden (and elsewhere)

by Michael Smith (Veshengro)

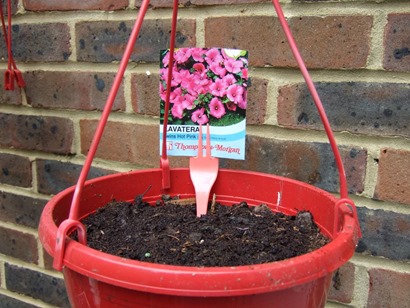
Plastic fork plant label holder1-webDon't toss those plastic knives, forks and spoons. There are number of reasons why you should plant them in your garden beds instead. No, they do not sprout roots if you do and reproduce, but for other reasons.

These days people are looking to be more environmentally conscious, which means using reusable utensils instead of plastic ones. However, if you have to use plastic utensils there are ways that you can reuse them instead of just tossing them out after eating one meal.

Also, although to some this may sound gross, why not pick up and take home those plastic cutlery pieces you may find laying about when on a walk or such. Plastic utensils can work wonders for your garden. Well, if not directly wonders then they still can be useful.

Deterring garden “pests”

Place plastic utensils in your garden to keep pests that might sabotage growth, like dogs and cats, at bay. They will not want to maneuver around the pointed objects where your fruits, vegetables, and flowers are in the process of growing.

If you have animals who like to trounce or do their business in your garden, certainly may want to use this option. You can remove the cutlery when your plants grow.

You, obviously, won't keep slugs and snails at bay with this method but it could help to keep squirrels, cats, and others off your plants when they are growing.

Plant labels

Don't waste your money on fancy garden labels. You can write the names of your plants on handles of the utensils and stake them in the ground next to your plant.

This goes especially for the white of light colored ones, not so much the black ones, unless you have a white permanent marker.

Alternatively, use plastic forks, and here the color does not matter, stuck into the soil by their handles, and tuck the pack into the tines.

White plastic spoons, for instance, you could paint and then write the name of the plant, or draw/paint a picture of it, on the spoon. The back of the bowl probably would work best for this.

Make a little fence

Place forks into the soil with the prongs facing upward and in a row to create a spiked fence. This will keep squirrels out – well, hopefully – and can also make a cute fence for a fairy garden, if you are thus inclined.

Strong plastic forks – more of the reusable plastic cutlery kind that people nevertheless tend to treat like disposable – can also serve as small garden forks in pots, hanging baskets, and window boxes, etc. for loosening soil should this be deemed necessary.

Oh yes, I did not get around to ideas about the “elsewhere”, but that might happen in another article.

© 2017

Alys Fowler: restrain your urge to tidy the garden

Don’t clear away those tired and broken brown stems – they’re essential to the health of your patch next year

I look at the leek and elephant garlic seedheads that are toppling over, and eye up the snapped-off poppy seedheads and other bleached bits of growth. There are many house-beautiful webs made by the garden spider (Araneus diadematus), with their distinct cross on their backs. The frost will kill off these spiders and with them take down much of the rest of the garden.

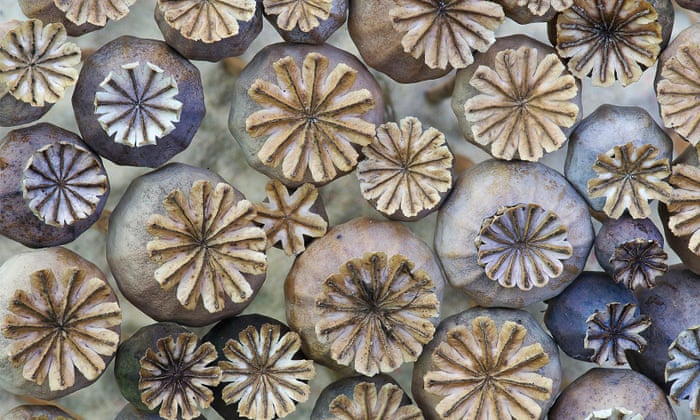
The garden is a dishevelled mess and I contemplate tidying it up a bit, but at this point in the season this is an act of mere vanity. We now know that all those tired brown stems are essential for wildlife – in particular, the broken and not so pretty ones. During the coming month the poppy seedheads will tumble and some of the globe artichoke heads will fall as the stems rot. Others will stand proudly, of course, but in my experience those that lie horizontal are the ones that are colonised quickly by other life.

Some creatures may move into the hollow stem and sleep there over the winter. Others may make them the roofs of their subterranean homes. Moulds, mildews and fungi will start to break down the tough lignin of these stems. But before these rot back into the soil, others will feed off those fungi and moulds.

Clearing up the garden now is disastrous, yet it is deep within our gardening culture. We all have an urge to tidy away anything that is less than aesthetically pleasing, but the health of next year’s garden lies in all that is not so appealing.

Read more here.

4 Fall Gardening Tips That Will Save You Money All Year Long

illustration of man on top of trowel in garden

Attending to your yard now will save time, money, and maintenance all year long.

Though spring gets all the garden-center glory, fall is a far better time to invest in your landscape. Doing the work now can save you a bundle in upfront costs—and it will continue to pay dividends all year. Not only do autumn plantings require less water and fertilizer, they also will have that much more time to get established before the withering heat of summer, which in warm climates can easily kill new plants. “But even where summers are milder, fall planting is lower cost and lower risk,” says Barbara Pierson, nursery manager at garden catalogue company White Flower Farm. Here’s what to do:

Pick Up Plants For Less

Many nurseries put their stock on sale in the fall to avoid storing it over the winter. You can save 40% to 50% off the price of plants, grass seed, even tools. “Don’t worry if plants have a few brown leaves,” Pierson says. “Remove them from their pots and make sure the roots are vibrant and not mushy.”

Better yet, skip the nursery and get your plants for free. Fall is the best time to “divide” spring-flowering perennials, such as day-lilies and peonies. You can literally cut a piece, roots and all, off your favorite specimens from the yards of friends and neighbors (with permission, of course) and pick a spot for them in your yard. This process is beneficial to the original plant, and something colorful that would otherwise set you back $10 to $20 or more costs absolutely nothing. (See burpee.com for instructions.)

Just make sure to get everything in the ground at least six weeks before your average first ground-freeze date; ask at a local nursery.

Read more here.

6 Dos and Don'ts Of Pruning

It could cause more harm than good to your bushes and trees.

fall pruning

There's something about this time of the year that makes people crave pruning more than vampires yearn for blood. With fall garden cleanup in full swing, maybe it's all the raking and mulching that has people going bananas. But before you start hacking at your trees and bushes, take a tip from a seasoned gardening expert. "The rules of fall pruning are simple: Prune nothing in the fall! That’s N-O-T-H-I-N-G! Nada! Bupkiss! Zilch! Zero! Ladies—hide the pruners from 'helpful husbands!'" pleads emphatic gardening expert Mike McGrath, author of Mike McGrath's Book of Compost, and radio host of WYYY FM Philadelphia's You Bet Your Garden radio show. That goes for shrubs and plants as well as trees, McGrath insists. "Hang little signs on your roses that say, 'Leave me alone until midwinter; or even better, spring.' There are no exceptions! Do not prune anything now. Got it?"

Do you feel like you just got scolded by a third-grade teacher? Let it serve as a reminder that fall is not the right time to trim trees and shrubs, even though the fallen leaves have exposed all their imperfections. That's right, put your pruning shears back in the shed for at least a month or so. Here are some pruning basics, to be used when it's a safer time to trim back trees and shrubs:

Read more here.

When Is The Best Time To Plant Trees?

Give them the best chance of survival.

planting fruit trees in the fall

Many trees grow well when planted in fall, says arborist Tom Tyler of Bartlett Tree Experts. Although people often associate planting with spring, fall offers some advantages, he explains. "Warm soil encourages root growth prior to the onset of winter, while air temperatures tend to be cooler and more stable, reducing the amount of stress on newly planted trees. Fall rains make it easier to dig and provide ample moisture." Container-grown and balled-and-burlapped trees are best for fall planting; bare-root plants should be planted while they’re dormant.

Read more here.

11 Easy Plants for Your Fall Garden

If your summer garden was a bit of a disappointment, first of all, know you are not alone. It was a wet, soggy, soaking summer around our parts (as well as most of the U.S.) and the gardens grew fungi instead of tomatoes this year.

I have great news if this was your garden … it's time for fall planting. Squeal!

It's time for fall planting.

I have had the most wonderful time the past couple of weeks putting in my fall garden. It's been cool and refreshing, and I have found complete and utter joy in ripping out my soggy, sad, dilapidated summer plants. Good riddance!

There is nothing like a fresh start, especially in the garden.

This is where I want to be. Right here on my knees, playing in the dirt, planting things and watching them grow. There is just nothing else like it, except maybe milking the cow, or bringing home baby piglets, or a kiss from a calf.

Here are 11 easy plants you can put in right now for a fall harvest:

Read more here.

HOME SEED DRYING & STORAGE

plant picture

This is a really important bit. You need to dry your seed out, or it will not keep.

Seed that is air-dry is not really properly dormant - its just napping;
so it is still burning through its stored reserves of energy and will soon run flat - like a mobile phone left on.

Also, you can't put it in a sealed container as it is still breathing - it would suffocate. And without a sealed container, it will soon reabsorb water from the air on the first humid day, and start getting ready to germinate.

How can we dry the seed at home?
We'll use dry rice to suck the water out of the seed & get it really dry. Then it will hibernate completely.

You need to get:

  • a big jam-jar with a good lid,
  • an old pair of tights,
  • a rubber band,
  • and some rice

You need to use at least twice as much rice as you have seed. It doesn't matter if you have too much rice, but too little won't work.

Read more here.

Plants That Grow Better Side-By-Side

Companion planting uses one species' advantages to help another.

Garlic and a Rose

Organic gardeners know that a diverse mix of plants makes for a healthy and beautiful garden. Many believe that certain plant combinations have extraordinary (even mysterious) powers to help each other grow. Scientific study of the process, called companion planting, has confirmed that some combinations have real benefits unique to those combinations. And practical experience has demonstrated to many gardeners how to mate certain plants for their mutual benefit. Companions help each other grow—tall plants, for example, provide shade for sun-sensitive shorter plants. And the technique uses garden space efficiently. Vining plants cover the ground, upright plants grow up, allowing for two plants in the same patch. Companions also prevent pest problems. Plants like onions repel pests and other plants can lure pests away from more delicate plants. Or one plant may attract the predators of another plant's pests.

Roses And Garlic
Gardeners have been planting garlic with roses for eons. since garlic can help to repel rose pests. Garlic chives probably are just as repellent, and their small purple or white flowers in late spring looks great with rose flowers and foliage.

Tomatoes And Cabbage
Tomatoes are repellent to diamondback moth larvae, which are caterpillars that chew large holes in cabbage leaves.

Read more here.

Bucket crops: Mississippi man takes container gardening to another level

Some people are happy with a patio tomato on the porch.

Willie Anderson, 82, took container gardening to another level; he planted tomatoes, cucumbers, corn, okra, squash, peppers and eggplants in five-gallon plastic buckets in his yard in Red Banks, Mississippi. He now has plants in more than 1,000 buckets.

It’s easier to grow an entire garden if you’re planting everything in buckets, Anderson said. “There’s no hoe on the place,” he said. “We don’t need one.”

“You don’t have to have any equipment,” said his son, Ron Anderson. “You don’t have to have any utensils to farm with as far as hoes and shovels. You don’t have to have a tiller. All you do is plant, water and harvest.”

The garden is totally organic. “I use grass clippings, soybean stalks, cotton hulls — that’s the waste that comes out when they gin the cotton,” Willie said.

Read more here.

Collecting and saving seed

Collecting and growing seed is a cheap way to get new plants. It’s also easier than you might think and few activities bring more pleasure than raising your own flowers at home.

The key to seed saving is to emulate nature as far as possible. Collect your seeds just before the plant is about to shed them. This doesn't involve hanging around decaying plants and waiting for seed heads to pop, but just keeping an eye on things.

As the plant begins to dry and turn brown, the seeds will be ripening so you should place a paper bag over the top of a flower head, cut the stem and invert the whole thing.

Tie the bag at the top before putting it somewhere to dry – hung from a the roof of a garage with good ventilation, for example. Check the bag after a few weeks and you should find seeds in the bottom of the bag. If not, you can give them a helping hand by rubbing or shaking the seeds out of the dry pods or seed heads.

Read more here.

SMALL FOOTPRINT GARDENING

Small-Scale Gardening

How will my blog, Small Footprint Gardening, mesh with GRIT Magazine and the rural lifestyle? After all, you’re more than likely on a few acres and don’t really need small-scale gardening methods. I hear you, but hear my out. Even though you may have extra space, do you have a lot of extra time? Probably not! So why not give yourself a well-deserved break and take advantage of an easy small-space gardening method for your personal garden?

My Garden

Here’s a photo of my main edible garden from a couple years ago. It is 2-by-23-foot and runs along a fence. As you can see, those modest 43 square feet are jam packed with a variety of veggies for my husband and I. Plus I use many of those squares two to three times per season.

Since 2010, I have been a Certified Square Foot Gardening Instructor, trained by the creator of the method, Mel Bartholomew. Although Square Foot Gardening is my main passion, I love adapting other normally large-scale methods, such as Hügelkultur and Back to Eden gardening on a smaller scale. The main advantage of these last two methods is that they use some things you’re always trying to get rid of as you clear land – logs and wood chips. Another bonus is that these methods require little, if any, supplemental water!

Another small-space idea would be container gardening that can provide a tremendous amount of food in a very small space. Think about how great it would be to grab a carrot out of a large terra cotta pot. So put away the tractor or rototiller and walk just a few steps from your kitchen door to pick your dinner salad, supper veggies, herbs and small fruits. Here are some reasons why you should think small:

1. Time is on your side. Small-space gardening methods will take mere minutes to care for. Even if you have several Square Foot Garden beds, it will usually take less than 15 minutes every day or two to water by hand, harvest and check for trouble – even less if you choose to use drip irrigation.

Read more: http://www.grit.com/blogs/small-footprint-gardening.aspx

An Easy Way to Multiply Your Shrubs

Have a shrub you love and want to make more? Create genetic duplicates with this easy technique

layering shrubsLayering is a plant-propagation technique that allows gardeners to make clones, or genetic duplicates, of their flowering shrubs and climbers. “Layers” are easier to root than stem cuttings because they remain attached to their parent plants—getting all the nourishment they need—while their new root systems develop.

Autumn is the primary season to layer deciduous shrubs in USDA Plant Hardiness Zones 7 and warmer; where winters are colder (and for evergreen shrubs), spring is the better choice. Some shrubs will send out roots in a matter of weeks, while others may take anywhere from 2 months to a year. During this time, the gardener need do little more than keep the soil moist and watch for developing roots.

Read more: http://www.organicgardening.com/learn-and-grow/an-easy-way-to-multiply-your-shrubs

Tips for Beginning Gardeners

Me in the gardenBeginning a garden is to embark into a world full of joy, excitement, and reward. For those of you who are just beginning to garden I say, "Welcome! Enjoy your mistakes, learn from them." As my grandfather told me, "The basics are the same for everyone, but we all have our own way of gardening." Don't be afraid to try and fail, learn and implement the lessons in your next garden. There is a great deal of information available to you, especially with the Internet, but that can be kind of daunting. I suggest finding a resource or two that you can identify with and trust. If you don't have someone in your family who is a gardener, the best thing to do is to find a local farmer and learn from them, you can start by visiting your local farmers' market. Most of us are happy to share our knowledge with someone who truly wants to learn.

I was fortunate to be born and raised a southern farm girl. When we are raised in a certain way, we tend to forget that not everyone knows what we know. Expecting a beginning gardener to know what we have learned over a lifetime, is like expecting me to go to Atlanta International Airport and know my way around! With that scary thought in mind, there are a few tips I have learned that I would like to share with you. Hopefully, these will enhance your gardening experience.

Read more: http://www.grit.com/farm-and-garden/do-it-yourself/tips-for-beginning-gardeners.aspx

How To Make a DIY Worm Tower

Make composting in your garden a speedy affair with your own worm tower by eliminating a few stages in the composting process. Your garden or yard will love you!

Worm TowerA Worm Tower is basically a length of pipe buried halfway in the ground with holes drilled in the buried part for worms to get in and out. Food scraps are added directly to the tower instead of into your composting bin, and are eaten by worms already living in the target part of your yard. You can add Worm Towers to your full blown vermiculture / vermicomposting regime or just use them by themselves, particularly in raised beds. Several steps and lots of time can be eliminated for some of your composting by simply delivering food waste directly to the worms, directly on to the garden.

What you need:

Length of PVC about 3 1/2 inches (89mm) or larger wide or if you can get it a length of bamboo – much more ecological

Something to cap the tube with. (I bought some caps but there are other suggestions like a flipped over plastic pot with some screen to keep out the flies

A saw that can cut through PVC

Drill with large drill bit. I used 1 1/8 inches (30mm) but in the videos looks like they use 1/2 inch (13mm)

Shovel

I had a 9 foot (2.74 metres) length of PVC already, but I did go buy three caps to seal off the top from flies and critters. Before starting this project I was reading about squirrels because several of them like digging in my garden. I was concerned that putting the compost into the garden might be an attraction, and it might, but I did learn that they can only smell about 6-8″ (152-203mm) under the surface of the ground. I took this into consideration when measuring out my pipe hole placement and my notes reflect that. Your results may vary.

Read more: http://www.permaculture.co.uk/readers-solutions/how-make-diy-worm-tower